Table of Contents
Introduction
Tired of metal braces but still want a straighter smile? 😬 Aligners are here to save the day! They’re clear, comfy, and practically invisible – perfect for fixing your teeth without the hassle. Ready to smile confidently? Let’s talk aligners!

What Are Aligners?
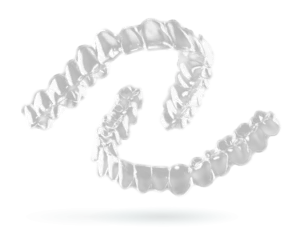
Aligners are custom-made, clear plastic trays that fit snugly over the teeth, exerting gentle pressure to gradually shift them into the desired position. Unlike traditional braces, which use brackets and wires to apply force, aligners utilize a series of trays, each slightly different in shape to facilitate the incremental movement of teeth.
How Do Aligners Work?
Getting started with aligners is easier than you might think! First, your orthodontist will take a close look at your teeth using X-rays, molds, or digital scans to understand your unique dental structure. They’ll then use special software to create a personalized plan that maps out exactly how your teeth will move step by step to give you that perfect smile.
Once the plan is ready, a series of custom-made aligners are created just for you. You’ll wear each set for about two weeks, gently shifting your teeth into place. When it’s time, you’ll switch to the next set in the series, and your teeth will keep moving little by little. It’s like a slow, steady journey to a straighter smile – no rush, no fuss, just progress
Step-by-step breakdown
1. Initial Consultation
What Happens: You’ll visit an orthodontist or dentist to discuss your goals (e.g., straightening teeth, fixing bite issues).
Evaluation: They’ll examine your teeth, gums, and overall oral health to determine if aligners are right for you.
Discussion: You’ll learn about the process, timeline, and cost.
Step 2: Dental Assessment and Imaging – The Foundation of Your Aligner Journey
This step is crucial because it lays the groundwork for your entire treatment plan. Think of it as the blueprint for your dream smile! Let’s break down what happens during this stage and why it’s so important.

What Happens During the Dental Assessment?
During your initial visit, your dentist or orthodontist will conduct a thorough examination of your teeth, gums, and jaw. This helps them understand your unique dental structure and determine if aligners are the right choice for you. Here’s what you can expect:
Comprehensive Oral Exam
Your dentist will check for any underlying issues, such as cavities, gum disease, or bite problems, that need to be addressed before starting treatment.
They’ll also evaluate the spacing, crowding, and alignment of your teeth to create a personalized plan.
Impressions or Digital Scans
Traditionally, dentists used putty-like material to take physical impressions of your teeth. While this method is still used, many clinics now rely on digital scanning technology.
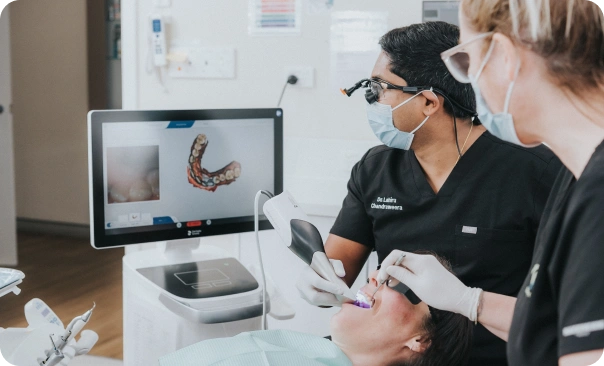
A handheld scanner takes precise 3D images of your teeth, creating a digital model that’s used to design your aligners.
X-rays and Photos
X-rays help your dentist see what’s happening beneath the surface, like the position of your tooth roots and jawbone.
Photos of your face and smile provide a visual reference to track your progress and plan the final outcome.
Step 3. Custom Treatment Plan
Digital Mapping: Using special software, your dentist will create a step-by-step plan showing how your teeth will move over time.
Preview: You’ll get to see a virtual simulation of how your smile will transform by the end of the treatment.
Approval: Once you’re happy with the plan, the aligners are created.
Step 4. Receiving Your Aligners
Custom-Made: A series of clear, removable aligners are made specifically for your teeth.
First Set: You’ll receive your first set of aligners and instructions on how to wear and care for them.
Step 5: Attachments or Buttons
Attachments (also called buttons) are tiny, tooth-colored bumps made of dental composite material. They’re bonded to specific teeth to help the aligners grip and apply the right amount of pressure to move your teeth.
Shape and Size: They can be round, rectangular, or customized to fit your treatment needs.
Placement: They’re strategically placed on certain teeth, depending on your treatment plan.
Step 6: Wearing the Aligners
Daily Wear: You’ll wear the aligners for 20-22 hours a day, removing them only to eat, drink, brush, and floss.
Switching Aligners: Every 1-2 weeks, you’ll switch to a new set of aligners. Each set is slightly different, gradually moving your teeth into the desired position.
Progress Checks: You’ll have periodic check-ups with your dentist to monitor progress and ensure everything is on track.
Step 7: Maintaining Oral Hygiene
Cleaning Aligners: Rinse and clean your aligners daily to keep them clear and free of bacteria.
Brushing and flossing: Maintain good oral hygiene to prevent cavities or gum issues during treatment.
Step 8: Completion of Treatment
Final Result: Once your teeth are perfectly aligned, you’ll stop wearing the aligners.
Before-and-After: You’ll see the amazing transformation of your smile!
Step 9: Retainers
Why They’re Needed: After treatment, you’ll need to wear a retainer to keep your teeth in their new position.
Types: This could be a clear retainer (similar to aligners) or a fixed wire behind your teeth.
Lifelong Care: Retainers are typically worn nightly to maintain your results.
Benefits of Aligners
Aligners offer several advantages over traditional braces, including:
- Aesthetic Appeal: Aligners are virtually invisible when worn, making them a discreet option for individuals who are concerned about the appearance of braces.
- Removable: Unlike braces, which are fixed in place, aligners are removable, allowing patients to eat, drink, and perform oral hygiene with ease.
- Comfort: Aligners are made from smooth, comfortable materials, reducing the risk of irritation to the gums and cheeks commonly associated with braces.
- Predictable Results: With careful treatment planning, aligners offer predictable results, allowing patients to visualize their progress throughout the treatment process.
- Improved oral Hygiene: Because aligners are removable, patients can maintain better oral hygiene compared to braces, reducing the risk of plaque buildup and tooth decay.
Limitations of Aligners
While aligners offer numerous benefits, they may not be suitable for all orthodontic cases. Some limitations include:
- Complex Cases: Aligners may not be effective for severe orthodontic issues such as large overbites, underbites, or skeletal discrepancies.
- Compliance: Successful treatment with aligners requires strict adherence to wearing schedules. Patients must wear their aligners for 20 to 22 hours per day to achieve optimal results.
- Speech Impediment: Some patients may experience temporary changes in speech patterns when wearing aligners, particularly during the initial adjustment phase.
- Cost: Aligner treatment can be more expensive than traditional braces, depending on the complexity of the case and the duration of treatment.
What are the Different Types of Aligners ?
1. Clear Plastic Aligners
What They Are: Clear, removable trays made of medical-grade plastic that fit snugly over your teeth.
How They Work: You wear a series of custom-made aligners, each one slightly different, to gradually move your teeth into the desired position.
Pros:
- Nearly Invisible: Clear and discreet, making them a popular choice for adults and teens.
- Removable: You can take them out to eat, drink, brush, and floss.
- Comfortable: No metal brackets or wires to irritate your mouth.
- Easy to Clean: Simply rinse or brush the aligners to keep them clean.
Cons:
- Discipline Required: Must be worn 20-22 hours a day for effective results.
- Not for Complex Cases: May not be suitable for severe orthodontic issues.
- Cost: Can be more expensive than traditional braces.
2. Lingual Braces
What They Are: Clear aligners that are placed on the back (lingual side) of your teeth, making them invisible from the front.
How They Work: Similar to traditional aligners but designed to fit behind your teeth.
Best For:
- Patients who want a completely hidden option.
- Mild to moderate orthodontic issues.
Pros:
- Completely invisible.
- Removable for eating and cleaning.
Cons:
- Can be uncomfortable on the tongue.
- May affect speech initially.
- More expensive than traditional aligners.
3. At-Home Aligners (Direct-to-Consumer Aligners)
What They Are: Clear aligners that are ordered online or through a remote dental service.
How They Work: You take impressions of your teeth at home (or visit a partner clinic), and the aligners are mailed to you.
Best For:
- Mild orthodontic issues.
- Individuals looking for a more affordable option.
Pros:
- Lower cost compared to Invisalign.
- Convenient and time-saving.
Cons:
- Limited professional supervision.
- Not suitable for complex cases or bite issues.
- Higher risk of improper treatment planning.
4. Hybrid Aligners
What They Are: A combination of clear aligners and traditional braces or attachments.
How They Work: Aligners are used in conjunction with small brackets or buttons to achieve more precise tooth movements.
Best For:
- Moderate to complex orthodontic cases.
- Patients who need more control over tooth movement.
Pros:
- More effective for complex cases than aligners alone.
- Still more discreet than traditional braces.
Cons:
- Slightly more noticeable due to attachments.
- May require more frequent dental visits.
5. Teen Aligners
What They Are: Clear aligners designed specifically for teenagers, often with features like compliance indicators.
How They Work: Similar to adult aligners but with added features to accommodate growing teeth and encourage consistent wear.
Best For:
Teens with mild to moderate orthodontic issues.
Pros:
- Discreet and removable.
- Designed to accommodate growing jaws and erupting teeth.
Cons:
- Requires discipline to wear consistently.
- May not be suitable for complex cases.
6. Accelerated Aligners
What They Are: Clear aligners combined with technologies like AcceleDent or Propel to speed up tooth movement.
How They Work: These systems use gentle vibrations or micro-osteoperforations to stimulate bone remodeling and reduce treatment time.
Best For:
- Patients who want faster results.
- Mild to moderate orthodontic issues.
Pros:
- Reduces treatment time by up to 50%.
- Still discreet and removable.
Cons:
- Higher cost due to additional technology.
- May cause mild discomfort during use.
7. Custom 3D-Printed Aligners
What They Are: Aligners created using advanced 3D printing technology for a more precise fit.
How They Work: Digital scans of your teeth are used to design and 3D-print aligners tailored to your unique dental structure.
Best For:
- Patients who want a highly customized fit.
- Mild to moderate orthodontic issues.
Pros:
- Extremely precise and comfortable.
- Faster production time compared to traditional methods.
Cons:
- May be more expensive than standard aligners.
- Limited availability depending on the provider.
What are the Different Materials Used to Make Aligners?
1. Thermoplastic Polymers (PETG and Polyurethane)
What They Are: Thermoplastic polymers are lightweight, durable plastics that can be molded when heated and retain their shape when cooled.
Why They’re Used:
PETG (Polyethylene Terephthalate Glycol): Known for its strength, flexibility, and clarity, PETG is a top choice for aligners. It’s comfortable to wear and maintains its shape over time.
Polyurethane: This material is highly durable and resistant to wear, making it ideal for long-term use. It’s also very transparent, so your aligners stay discreet.
Benefits:
Comfortable and flexible for easy wear.
Crystal clear for a nearly invisible look.
Durable enough to last through daily use.
2. Polyurethane-Based Resins
What They Are: A type of resin known for its toughness and transparency.
Why They’re Used: These resins are highly resistant to wear and tear, making them perfect for aligners that need to last through weeks of use.
Benefits:
Extremely durable.
Maintains clarity over time.
Provides a snug, comfortable fit.
3. Acrylic Resins
What They Are: A less common material used for aligners, acrylic resins are transparent and durable.
Why They’re Used: While not as strong as PETG or polyurethane, acrylic resins are still a good option for certain types of aligners.
Benefits:
Good transparency.
Lightweight and comfortable.
Drawbacks:
More prone to wear and tear compared to other materials.
4. Composite Materials
What They Are: A blend of polymers and ceramic particles that combine the best of both worlds.
Why They’re Used: These materials are strong, durable, and highly transparent, making them ideal for aligners that need extra strength.
Benefits:
Enhanced durability.
Excellent clarity.
Resistant to staining.
Fabrication of Aligners Using CAD/CAM Systems
Step 1: Digital Scanning
What Happens: Instead of those messy, gooey impressions, your orthodontist uses a high-tech intraoral scanner to take detailed 3D images of your teeth and gums.
Why It’s Cool: It’s quick, comfortable, and super accurate—no more gagging on putty!
Step 2: Digital Model Creation
What Happens: The scan is turned into a virtual 3D model of your teeth using specialized software.
Why It’s Cool: Your orthodontist can zoom in, rotate, and analyze your teeth from every angle to create the perfect treatment plan.
Step 3: Treatment Planning
What Happens: Using the 3D model, your orthodontist maps out exactly how your teeth will move step by step. They’ll design a series of aligners to get you to your dream smile.
Why It’s Cool: You’ll even get to see a virtual preview of your future smile before you start!
Step 4: Aligner Design
What Happens: With CAD software, your orthodontist designs each aligner to fit your teeth perfectly. They tweak the shape and position of each tooth to ensure the aligners work just right.
Why It’s Cool: Every aligner is custom-made for your unique smile—no one-size-fits-all here!
Step 5: CAM Processing
What Happens: The digital design is sent to a CAM system, which turns it into instructions for a 3D printer.
Why It’s Cool: It’s like sending a blueprint to a robot that builds your aligners with pinpoint accuracy.
Step 6: 3D Printing
What Happens: A 3D printer creates your aligners layer by layer using biocompatible resin. High-tech methods like stereolithography (SLA) or digital light processing (DLP) ensure every detail is perfect.
Why It’s Cool: It’s fast, precise, and uses materials that are safe for your mouth.
Step 7: Post-Processing
What Happens: The aligners are cleaned up, smoothed out, and cured with UV light to make them strong and comfortable.
Why It’s Cool: This step ensures your aligners feel great and look crystal clear.
Step 8: Packaging and Delivery
What Happens: Once approved, your aligners are packaged up and sent to your orthodontist. You’ll get a series of trays along with instructions on how to wear and care for them.
Why It’s Cool: It’s like getting a personalized smile kit delivered just for you!
Differentiating Between Braces and Aligners
Choosing between traditional braces and aligners can feel like a big decision when it comes to straightening your teeth. Both options are great for fixing crooked teeth and bite issues, but they work in very different ways and come with their own pros and cons. Let’s break it down so you can see which one might be the best fit for you:
How They Work
Braces:
- What They Are: Metal brackets are glued to your teeth, connected by wires and tiny rubber bands.
- How They Work: The wires apply steady pressure to move your teeth into place. Your orthodontist adjusts the wires every few weeks to keep the pressure just right.
Aligners:
- What They Are: Clear, removable trays made of smooth plastic.
- How They Work: You wear a series of custom-made aligners, each one slightly different, to gradually shift your teeth. They’re designed using digital technology to map out your smile transformation.
Benefits
Braces:
Great for Complex Cases: If you have severe misalignment or bite issues, braces can handle it.
Predictable Results: The constant pressure means your teeth move steadily and reliably.
Cost-Effective: Braces are often more affordable than aligners.
Aligners:
- Nearly Invisible: Clear aligners are super discreet—most people won’t even notice you’re wearing them.
- Removable: You can take them out to eat, drink, brush, and floss, making life a lot easier.
- Comfortable: No metal brackets or wires to irritate your mouth.
Side Effects
Braces:
- Discomfort: Your teeth might feel sore after adjustments.
- Oral Hygiene Challenges: Brushing and flossing can be trickier with brackets and wires.
- Soft Tissue Irritation: The metal parts can sometimes rub against your lips, cheeks, or tongue.
Aligners:
- Speech Changes: You might talk a little differently at first, but most people adjust quickly.
- Compliance Issues: You need to wear them 20-22 hours a day for them to work.
- Allergic Reactions: Rare, but some people might be sensitive to the materials.
Which One is Right for You?
- Choose Braces if you have complex orthodontic issues or want a more budget-friendly option.
- Choose Aligners if you want a discreet, removable, and comfortable solution for mild to moderate alignment issues.
FAQs
The cost of aligners can vary depending on the provider, the type of treatment, and your location. Here's a general breakdown:
At-home aligners (like SmileDirectClub, Candid, or Byte):
- Cost: $1,500 - $2,500
- These are typically less expensive since they don’t involve in-person visits with orthodontists. The price may include the cost of the aligners, an initial consultation, and remote monitoring.
In-office aligners (like Invisalign):
- Cost: $3,000 - $8,000
- These aligners are prescribed and monitored by an orthodontist or dentist. The higher cost often includes a more personalized treatment plan and regular office visits for adjustments.
insurance coverage for aligners can vary depending on your insurance plan. Here’s an overview of how it typically works:
Traditional Health Insurance:
- Most traditional health insurance plans do not cover orthodontic treatments like aligners (including Invisalign). They tend to cover medically necessary treatments, not cosmetic procedures.
- However, some plans may include orthodontic benefits as part of their dental coverage, and these may extend to aligners. Typically, this coverage applies to children under a certain age (often under 18), but adults might also have partial coverage in some cases.
Dental Insurance:
- Some dental insurance plans may offer partial coverage for orthodontic treatments, including aligners. This is more common for children, but it can sometimes extend to adults as well.
- Typically, dental plans cover a portion of the cost (often 50%), up to a certain annual maximum (usually between $1,000 and $2,000). However, there are usually limits on how much of the cost will be reimbursed, and aligners may not be covered under all plans.
Flexible Spending Accounts (FSAs) and Health Savings Accounts (HSAs):
- If you have an FSA or HSA, you can use these accounts to pay for aligners with pre-tax dollars. This can help offset the out-of-pocket costs of treatment.
Orthodontic Insurance Plans:
- Some insurers offer specific orthodontic insurance plans that cover treatments like Invisalign. These plans typically cover both braces and aligners, but the coverage may vary, so it’s important to check the specific details with the insurance provider.
Payment Plans and Discounts:
- Even if your insurance doesn't fully cover aligners, many providers, including Invisalign, offer payment plans or financing options. These can make the cost more manageable, and some dental offices may even offer discounts if you pay upfront.
Yes, aligners can help fix overjet, which is when the upper teeth protrude significantly over the lower teeth. However, the extent to which aligners can correct an overjet depends on the severity of the condition and the specifics of your case.
How Aligners Can Fix Overjet:
Mild to Moderate Overjet: Aligners like Invisalign are often effective in correcting mild to moderate overjet, as they can gradually move the teeth into better alignment over time. Aligners apply gentle, controlled force to move the teeth, and they can reposition the upper and lower teeth so they come together properly.
Severe Overjet: For more severe overjets, aligners may still be able to help, but the treatment plan may take longer, and in some cases, additional interventions (such as elastics or rubber bands) may be needed to address the issue more effectively. In extreme cases, traditional braces might be recommended instead of aligners for optimal results.
Treatment Plan:
Consultation with an Orthodontist: An orthodontist or dentist will assess the extent of your overjet and determine whether aligners are the right treatment. They will take digital scans or X-rays to create a custom treatment plan that addresses your specific needs.
Elastics: For many cases of overjet, aligners will involve using elastics that help to move the teeth into a more favorable position. These elastics are attached to the aligners and help correct bite problems.
Yes, aligners are generally considered cheaper than traditional braces, but there are several factors to consider:
1. Cost Comparison:
- Aligners (like Invisalign): Typically range from $3,000 to $8,000 in the US (₹70,000 to ₹2,50,000 in India), depending on the complexity of the case.
- Braces: Traditional braces generally cost between $3,000 and $7,000 (₹70,000 to ₹2,00,000 in India), but in some cases, they can be more expensive, especially if you need more complex treatments (like lingual or ceramic braces).
2. Factors Affecting Cost:
- Complexity of Treatment: If your dental issues are mild, aligners might be more cost-effective, whereas for more complex cases, braces may be needed, and the cost may be similar or even higher for braces.
- In-office Visits: With aligners, some treatments are done remotely (for brands like SmileDirectClub), making them generally cheaper. But with in-office treatments (like Invisalign), the costs can rise due to the need for regular orthodontist visits.
- Duration of Treatment: Aligners tend to be used for shorter treatment times in some cases, while braces might take longer. The longer the treatment, the higher the cost, as it includes both the duration and the number of appointments.
3. Other Costs:
- Braces often involve additional costs for adjustments, tightening, or emergency visits, while aligners might have fewer office visits, but the cost can still be high for replacements or revisions if necessary.
Yes, Invisalign can work effectively for many people, but its success depends on the specific dental issues you're trying to correct. Here’s a breakdown of what Invisalign can and cannot do:
Invisalign Can Fix:
Mild to Moderate Overbite and Overjet: Invisalign can address issues where the teeth are slightly or moderately out of alignment, including overbite (where the upper teeth overlap the lower teeth) and overjet (where the upper teeth protrude).
Crowding: If your teeth are crowded, Invisalign can shift them into better alignment, creating space for teeth to move properly.
Spacing Issues: Gaps between teeth (diastema) can also be closed effectively using Invisalign aligners.
Crossbite: Invisalign can be used to correct cases of crossbite, where the upper and lower teeth don’t align properly when you bite down.
Open Bite: If you have a slight open bite (when the upper and lower teeth don't touch when biting), Invisalign can help close the gap.
What Invisalign May Not Be Best For:
Severe Bite Issues: Severe bite problems, such as extreme overbite, underbite, or crossbite, may require more advanced treatments (e.g., traditional braces or even surgery in some cases).
Significant Teeth Rotation: Invisalign may struggle with rotating very tilted teeth, especially in cases where the tooth has been tilted at a significant angle. Traditional braces can often provide better control over complex rotations.
Severe Jaw Alignment Problems: If your jaw is misaligned, Invisalign alone may not be sufficient, and you might need additional treatments such as jaw surgery, depending on the severity.
How Invisalign Works:
- Custom Treatment: Invisalign uses a series of custom-made, clear aligners that are designed to gradually move your teeth into better alignment. You wear the aligners for 20-22 hours a day, removing them only for eating, drinking, brushing, and flossing.
- Regular Monitoring: You'll visit your orthodontist every 6-8 weeks to track your progress and get new sets of aligners.
- Duration: Treatment time usually ranges from 6 months to 18 months, depending on the complexity of your case.


